Archive for the ‘Sweets & Desserts’ Category

DSC_1049

So I am back with one more ice cream recipe. I thought before the harsh winter knocks at your door why not enjoy the full on summer with cold novelties and treats. And whats better than a scoop of ice cream. Or a tub? That sounds better I must say. By the way you don’t need any excuse of weather to enjoy any food. . . For me, weather has never been a decisive factor to enjoy any type of food. I can very well enjoy a hot bowl of  soup in a hot summer day or ice creams and other cold novelties in winters. Ice cream in winters is actually fun as there is less of dripping and melting. So you can enjoy it long and you will also have less people to share, I guess so. Food is all about comfort and whats better than an ice cream. It works well even when you are having a bad day and I think many of you would agree to that. I am one of those guilty mom who sneakingly enjoys her favorite ice cream or cake when the little one is taking his afternoon nap and blame it all on my mood, bad day ,exertion or whatever works. So point here is food gives me inner pleasure and it would be same for many of my kind.

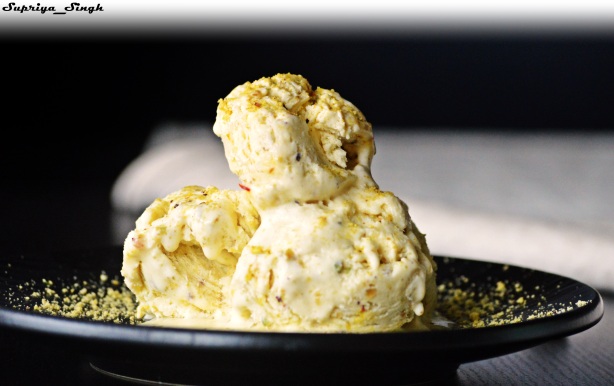
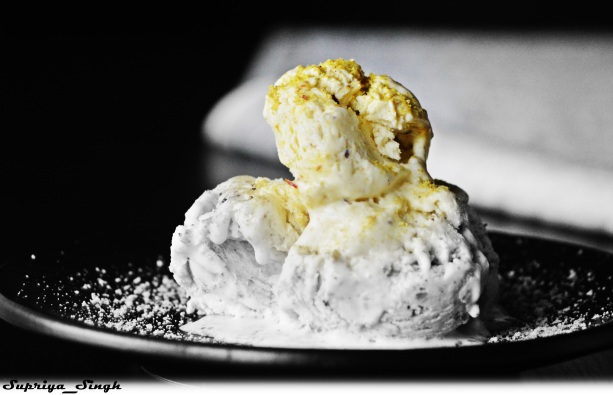
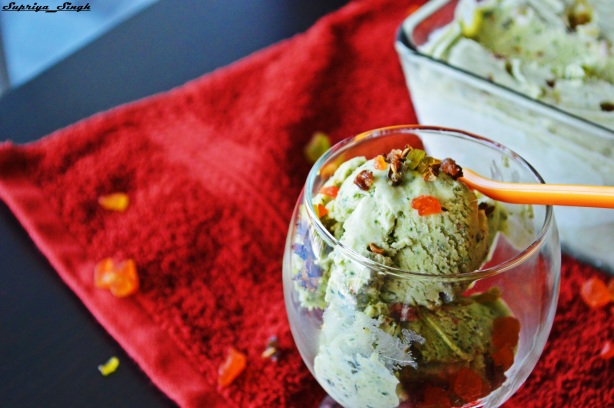
My motto for this summer was to try various interesting flavors. The Ice cream recipe which I am sharing here today is unique and my second favorite flavor after Mango. Paan or betel leaves are very good for digestion and is very famous in India as a mouth freshener. Mostly its enjoyed after a meal but people who loves it can be seen chewing anytime. The thought of Paan ice cream would not have strike me had I not tried it on my own. And I instantly fall in love with the fresh flavors and pleasant taste. So what are you waiting for. Try this and do let me know your reviews.
Ingredients :-

Betel Leaves, washed and finely chopped
5
Fennel Seeds
1 teaspoon
Pitted Dates, Finely chopped
2 tablespoon
Tutti Frutti/Candied fruits
2 tablespoon
Gulkand/Rose petaled jam
2 tablespoon
Rose essence
1/4 teaspoon
Cardamom Powder
1/4 teaspoon
Cashew and Almond, chopped
2 tablespoon
Whole Milk, chilled
1/4 cup
Condensed Milk, chilled
1/2 cup plus 2 tablespoon
Heavy Whipping Cream, chilled
1 cup

DSC_1071

Method :-

  • Soaked the dates in half of the milk for about 1 hour.
  • Put one big bowl along with whisk attachments in refrigerator for 15- 20 minutes
  • In a blender jar add the chopped betel leaves, fennel seeds, gulkand, dates along with remaining milk and blend all the ingredients very well to form a homogeneous mixture.
  • Beat the chilled whipping cream in the bowl on medium speed until the cream is nice and thickened.
  • Add condensed milk to it and beat for 1 more minute.
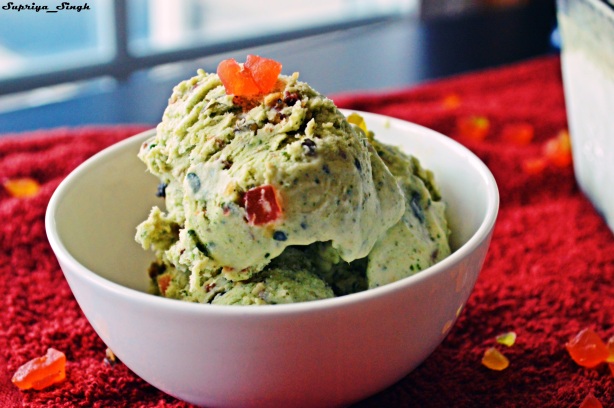
  • Now add the betel leave paste, tutti frutti, rose essence, chopped nuts and cardamom powder to the ice cream base and fold them gently into the mixture until well combined.
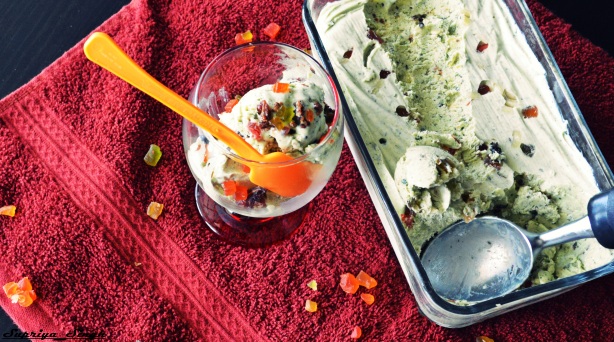
  • Transfer the ice cream mixture into airtight container.
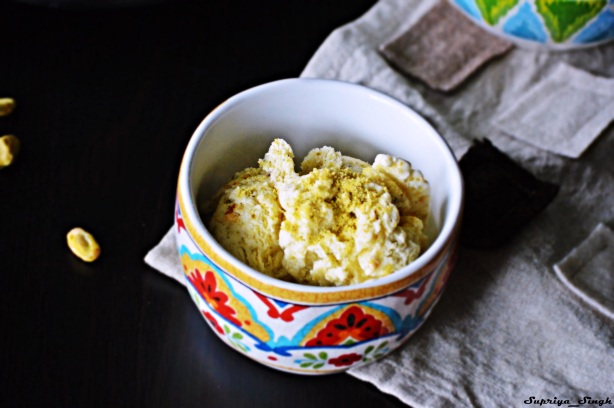
  • Garnish it on top with some tutti frutti and chopped nuts.
  • Cover it tightly with plastic foil wrap. Make sure the plastic foil touches the ice cream mixture everywhere and there is no air between the ice cream mixture and plastic foil wrap.This ensures that there is no ice crystal formation in the ice cream. Finally put the air tight lid.
  • Let the ice cream set overnight.
  • Enjoy it all alone or if you are generous enough to share enjoy it with your loved ones.

DSC_1076


Notes :-

  • Tutti Frutti (Candied fruits), betel leaves, gulkand( rose petaled jam), fennel seeds and rose essence can be easily found in any Indian grocery store.
  • Optional – If you want you can add 1-2 drops of green food color to enhance the color of ice cream. Personally I don’t like food colors so I skipped it. 
  • As always mentioned in all my ice cream recipes chill the ingredients specially the whipping cream, condensed milk, evaporated milk if using any.

DSC_1085

Every time I decide I will cutoff sugar from my diet, I get tempted and lured by some interesting dessert recipes. When it comes to ice cream, there is hardly anyone who can resist temptations. Ice cream is utterly creamy and melt in mouth delight. This year has been the ‘ice cream’ year for me as I have tried various varieties of it since onset of summer. I am not that fond of eating ice cream except for few selective flavors but my near and dear ones do like it which motivates me to try different varieties and when they give heads up it gives me immense satisfaction. Of course, who doesn’t like all the praises attached with all the hard work you have put in! It really makes my day happy happy.

Today I have brought you the smoothest and creamiest concoctions that can me made right into your kitchen with no effort at all. I could not stress on the fact that it tastes so so much like store bought ice cream. Before I go gaga about this ice cream I just want to let you know I didn’t want to make it in the first place because of its content – Coffee and Chocolate – which are not in my favorite list. Once it was made, I was very pleased and actually liked the taste of it. The secret (or not so secret) about this ice cream is a key ingredient – Mascarpone cheese. I have never tried my hands on with Mascarpone cheese except Tiramisu cake. After the outcome with this ice cream, I think I will try this ingredient more often in my dessert and specially with ice creams. The Mascarpone cheese leads to less or no churn and less work with great results. So let not go much into talking and start with the recipe. Do try it once and let me know your inputs and reviews.

Ingredients :-

Heavy Whipping cream, chilled
1 cup
Mascarpone Cheese
6 oz
Hazelnut, Toasted and roughly chopped
1/2 cup
Coffee powder, any of your favorite
2 tablespoon
Condensed Milk, chilled
1 cup
Chocolate Chips
1/2 cup
Chocolate Shaving, optional for decoration
2 tablespoon


DSC_1082

Method :-

  • Brew the coffee powder in 2 tablespoon of water and let it cool completely.
  • Put one big bowl along with whisk attachments in refrigerator for 15- 20 minutes
  • Beat the chilled whipping cream in the bowl for about 10 minutes till it becomes dense and peaks are soft.
  • Add the condensed milk, mascarpone cheese, brewed coffee and beat on high for 5 more minutes until the mixture is well combined.
  • Finally add the toasted hazelnuts and chocolate chips and fold it gently.
  • Take a wide glass pan or loaf pan and pour the mixture into it.
  • Spread Chocolate shavings on top of it.
  • Cover it tightly with aluminum foil or plastic foil wrap so that there is no ice crystal formation. Finally put the air tight lid.
  • Let the ice cream set overnight.
  • Enjoy it as it is or with some drizzled chocolate syrup.

DSC_1095

Note :-

  • Amount of sweetness can be increased or decreased depending on individuals taste.
  • Chiller the ingredients are better the ice cream will be. This is the mantra for homemade ice creams.

DSC_0979

The summer is here finally and its time to stay hydrated and beat the torching heat by generous dollops of ice cream. I hardly know any person who doesn’t like ice cream except me. Yep, that’s right. I do not like store bought ice cream a lot since they are loaded with sugar and has artificial taste. Though I do like some flavors like Mango, Seetaphal (Custard Apple) specifically from Naturals (Ice cream joint in India) and Kulfis (different style of Indian ice cream). I love Bengali sweets a lot (I have grown up eating those since childhood) and simple cakes without frosting. I have only tried making ice cream couple of time with my favorite flavor Mango. Hence, I decided to try different flavors. The combination of Kesar and Pista is very popular and common in Kulfi so I thought of trying it with ice cream. This ice cream turned out very good and was very happy to make it. Homemade ice creams are not only good in taste but also defeat the store bought ones with the fresh flavors. This ice cream is very rich, luscious and creamy in taste with lots of flavors of Pista (Pistachio) and Kesar (Saffron). You don’t need any machine to make this as it can be made by simple hand mixer. This ice cream is full of Indian flavors and appeals to all including elders and especially kids. Enjoy it after a hearty meal and let yourself lose into rich aroma and indulgent texture.

Ingredients :-

Heavy Whipping cream, chilled
1 cup
Evaporated Milk, chilled 1 cup
Pistachios, half chopped and half grounded
1/2 cup
Saffron
few strands soaked in 1/4 cup whole milk
Condensed Milk, chilled
1 cup
Rose water few drops
Kewra Essence few drops

DSC_0984

Method :-

  • Take 2 big bowl and keep it in refrigerator for half an hour.
  • Take one of the bowls and beat the chilled evaporated milk until it increases doubled in volume.
  • In another bowl beat the chilled heavy cream until it holds soft peak and increases double in size.
  • Add the rose water, kewra water, doubled evaporated milk and condensed milk to the whipped cream and mix it with the help of beater on low speed until well blended.
  • Add the chopped and grounded pistachios and mix gently.
  • Pour it in air tight container and cover it with aluminum foil tightly so that there is no ice crystal formation. Finally put the air tight lid.
  • Let it set for about 6 hours or overnight.
  • Once set enjoy it with some garnished pistachios.

DSC_0975

Notes :-

  • The key for making ice cream is chilled ingredients. I have kept whipping cream, evaporated milk and condensed milk in refrigerator for at least 2-3 hrs.
  • Keep the containers/bowls and beaters in refrigerator in which you will whip cream and evaporated milk.
  • You can increase or decrease the quantity of condensed milk depending on your liking for sweetness.
  • Make sure the container in which you keep ice cream should be airtight.

DSC_0216

While browsing through the food pictures from last year, I came across above picture and thought to post it on the blog. Its not one of the best pictures I clicked but I did not get time to bake this cake again for new pictures. There are too many dishes to experiment with and hence most of the times I am not able to re-create my old recipes. I love this cake for its sweet and tangy taste. The sweetness comes from blueberry and tangy taste comes from fresh squeezed orange juice. In the picture you can see how hastily I cut the cake before it cooled down. I am just like that – impatient. I couldn’t wait for the cake to cool down to have a good slice as I wanted to taste it so badly. That will be my advice and tip for any cake – make sure that the cake is not hot/warm and is cooled before cutting the slice from it. You will get the best slice of cake if kept in freeze for at least one hour.You can relish this cake with a cup of milk, coffee or tea. This cake can be a prefect gift to someone you love, someone special like mom as mother’s day is nearby. 

Ingredients :-

All purpose flour 1 and 1/2 cup minus 3 tablespoon
Blueberries 1 cup
Orange juice 1/2 cup
Orange zest 1 tablespoon
Sugar 1 cup
Baking powder 1 and 1/2 teaspoon
Baking soda 1/2 teaspoon
Salt 1/2 teaspoon
Yogurt 1/2 cup
Cornstarch 3 tablespoon
Oil 1/2 cup
Vanilla essence 1 teaspoon

DSC_0225

Method :-

  • Preheat oven to 350 degree Fahrenheit.
  • Coat a 9×5 inch loaf pan well with non-stick cooking spray or butter. You can even line the bottom of pan with parchment paper.
  • Wash the blueberries and pat them dry with a kitchen towel. Add some all purpose flour to the blueberries once they are dry and give a good mix. Keep it aside.
  • Sieve the all purpose flour/maida along with cornstarch/cornflour twice to ensure the even mixing.
  • Mix yogurt and sugar in other bowl and add baking powder and baking soda and let it rest for 2-3 minutes so that mixture turns bubbly and frothy.
  • After the mixture turns frothy add oil, vanilla and orange juice to it. Mix well.
  • Add the flour mixture one tablespoon at a time to the wet mixture and mix well. Do not over mix.
  • In the end add the blueberries and orange zest and fold them gently.
  • Put the batter into the prepared loaf pan and bake for 45-50 minutes or until toothpick inserted comes out clean.
  • Allow to cool it on wire rack. Let it completely cool before slicing and serving.

DSC_0208

Notes :-

  • You can use orange flavored orange yogurt to enhance the taste
  • You can use cranberries instead of blueberries or mix of both as as both goes well with orange 
  • If you see the top browning too fast loosely cover the cake with aluminium foil.

IMG_0248

Over the past couple years, I have started to bake more often primarily as the store brought cakes are little too sweet for my taste buds. I do like homemade cakes, though. I initially started baking using eggs but its a lot of work for me. Hence, I started to learn baking egg-less cakes. It does not require any special equipment, but there are certain ingredients which helps in making egg-less cakes awesome. The secret ingredient being Vinegar and baking soda, which makes the cake soft and spongy. When Vinegar reacts with baking soda it create air bubbles which result in light aerated cake. Although, I have not tried it but I have heard that you can make egg-less cake with Coca Cola. I will definitely try that too and let you know the outcome. In this cupcake recipe, one of the best thing is the combination of chocolate and raspberry. The cupcake turned out to be light & fluffy and raspberry mousse elevates the taste and brings it to a new level by bringing mild tartness and sweetness together. This is one of the best cupcakes you can try in spring and summer. I personally like to add fruit in cakes or any dessert as it brings lots of colors and freshness to it. This cupcake is very close to my heart as it was made for my cupcake, my little munchkin 5th month birthday celebration. So enjoy this delicious treat on any occasion with your family and friends. 

Ingredients :-

For Chocolate Cup Cakes :-

All Purpose flour 1 and 1/2 cups
Sugar 1 cup
Salt  1/2 teaspoon
Baking Soda 1 teaspoon
Unsweetened Cocoa Powder 1/3 cup
Vanilla Extract 1 teaspoon
Water 1 cup
Vinegar 1 tablespoon
Oil  1/2 cup

For Raspberry Mousse Frosting :-

Fresh Raspberries 6 oz
Corn Starch Powder 1 tablespoon
Sugar 3/4 Cup
Agar Agar Powder 1 and 1/2 tablespoon
Water 1/3 cup
Cream Cheese 2 1/2 teaspoon
Heavy Whipping Cream 1/2 cup

IMG_0217
Method :-

For Chocolate Cup Cakes :-

  • Preheat the oven for 350 degree Fahrenheit or 180 degree Celsius.
  • Sift all purpose flour and cocoa powder together at least 2 times along in a bowl to remove lumps if any. Sifting also helps in lightening the cake.
  • In the same bowl add sugar, baking soda and salt.
  • Line the muffins tray with cupcakes liner.
  • In other bowl mix all the wet ingredients – water, oil, vanilla extract and vinegar.
  • Combine the wet mixture with dry ones mixing with spatula. Using wire whisk beat the mixture till well incorporated.
  • The batter will not be very thick. Do not over mix it. 
  • Bake it for 15-20 minutes or until toothpick inserted comes out clean.
  • Let them cool down completely before frosting otherwise frosting will melt. Its better to keep the cupcakes in freeze for one hour so that frosting can easily set into it. 

For Raspberry Mousse :-

  • For raspberry mousse first we need to start with raspberry jam.
  • In a pan soak the agar agar powder in hot water for about 10 minutes.
  • In a medium pan heat raspberry, sugar, salt and cornstarch on medium heat. Cook  until the mixture gets thickened, pressing the raspberries with spatula in between.
  • It will take about 6-8 minutes. Add the agar agar mixture and boil for one more minute.The mixture should be like a thick slurry in consistency.
  • Then press the raspberries through a strainer, discard the pulp and seeds and reserve the jam. Let it cool.
  • In a deep pan add the cream cheese and heavy whipping cream and with help of beater/hand mixer/stand mixer  beat it on high until soft peaks are formed.
  • Now fold the cooled down raspberry jam into whipped cream mixture gently and slowly. 
  • Refrigerate the mousse at least 6 hours to set it completely. So you can make the mousse one day ahead of the cupcakes to make it as frosting. You can even enjoy the mousse separately
  • Once the cupcakes are completely cool frost them with mousse as you want. You can pipe and decorate or just with help of knife spread it on top.
  • Garnish the cupcakes with fresh raspberries on the top and keep it in in freeze in air tight container.

page1


Note :-

  • While folding the cream and raspberry jam you have to do it very gently otherwise all the air created during whipping will be lost and mousse will not be light.
  • If you don’t get fresh raspberries you can make the mousse with frozen one too. You can also try the mousse with strawberry as strawberry and chocolate is a known world class combination.
  • This cupcake stays good for 4-5 days in refrigerator.
  • Make sure to use good quality cocoa powder for cupcakes as type of cocoa powder can affect the quality of final result.

IMG_3526

There are times when I feel so lazy to cook daily routine food and want to do something else to make things more exciting. That’s the time when baking comes to my rescue. Baking is an art new to me which I am acquiring slowly and steadily. I love baking be it cakes, muffins, bread etc. It brings me inner joy and pleasure and make me forget all the hassles of day-to-day life. These days I have been experimenting more of ‘egg less’ cakes as I am still learning it. Its fascinating and exciting to see that cakes can still be as moist and fluffy as they are with eggs. Most of my ‘egg less’ baking involves less butter and hence a guilt free delight. I dedicate this yummy muffin recipe to all blueberry lovers. I love blueberry in any form and what would be more appealing than a blueberry muffin or a cake. Its one of my favorite cake. You can even frost this muffins with blueberry mousse to make wonderful cupcakes. I will try for sure and will update my blog accordingly. Till then enjoy this!
Ingredients :-

All Purpose Flour
1 and 1/2 cup minus 3 tbsp
Fresh Blueberries
1 Cup
Cornstarch
3 tbsp
Plain Yogurt/Curd
1 cup
Oil
1/2 cup
Sugar 3/4 cup
Baking Powder 1 tsp
Baking Soda
1/2 tsp
Vanilla Essence
1 tsp

Method :-

    • Wash and dry  the blueberries with kitchen towel and sprinkle 1-2 tsp all purpose flour. Keep aside.
    • Preheat oven to 350 degree Fahrenheit/ 180 degree Celsius.
    • Line the muffin tray with muffin liners.
    • Sieve the all purpose flour and cornstarch together twice or thrice to ensure that they mix evenly. Keep it aside
    • Mix curd and sugar in big bowl well. Add the baking powder and baking soda and mix well. let it rest for 3-4 minutes.
    • Now you can see the mixture slightly frothy. Now mix oil and vanilla well to it.
    • Add the flour in batches and mix well so that no lumps remain.
    • Add the blueberries to the mixture and mix evenly.
    • Spoon 3/4th of the prepared muffin liner with batter.
    • Bake for 20-25 minutes or until toothpick inserted comes clean.
    • Cool over on a wire rack.

IMG_3518

Note :-

  • Do not forget to sprinkle some All purpose flour on blueberries so that blueberries doesn’t sink to bottom.
  • Do not beat batter after adding blueberries.
  • Sieving is important part. Don’t miss that as it ensures the even mixing and remove lumps if any.

DSC_0067

Its more than one year since my last post and I simply cant believe how fast time flies. The year 2014 was so much busy as I delivered a cute baby boy who is now one year old. The whole year was really exciting, overwhelming and a roller coaster ride for me. But now as everything has started settling down I restarted to experiment with my love “the food”. All through this time, I did experiment new recipes, took pictures but unfortunately did not get enough time to write the blog. The little one was of course keeping me very busy all the time. I think all the mothers out there can understand what it means to be a MOM. Really Hats Off to all Mothers in this world! Its the most purest and dedicated job in this world. Now coming back to my recipe – I thought of sharing something I really enjoy these days – Baking. I used to make sure to celebrate monthly birthdays of my little one and tried different types of cup cakes on each occasion. Some of them were clicked and some of them were missed. Today I want to share Egg-less Black Forest Cake which I made for his 6th month and 1 year birthdays. I am in love with this cake as its super moist and very light. Black Forest Cake as famous in the US and as Black Forest Gateau in the UK is  a German dessert name Schwarzenegger Kirsch Iorte. It consist of several layers of chocolate cake with whipped cream and cherries in between each layers. Now enough of chatter lets get back to recipe.

Ingredients :-

For Egg less Chocolate Cake :-

All purpose flour 1 1/2 cup + 2 tbsp for dusting
Granulated Sugar 1 cup
Cocoa Powder 1/3 cup
Baking Soda 1 teaspoon
Salt 1/2 teaspoon
Water 1 cup
Oil  1/2 cup
Pure Vanilla Extract 1 teaspoon
Vinegar 1 tablespoon

For Cherry Filling :-

Dark red sweet pitted cherries 1 can
Sugar 1/3 cup
Corn Starch 3 tbsp
Lemon juice 1 tsp
Water 1 1/4 cup

For Sugar Syrup :-

Reserved Cherry Syrup 1 cup
Sugar 1/4 cup
Kirsch or Cherry Brandy 2 tbsp

For Whipped Cream :-

Heavy Whipping Cream 2 cup
Sugar 1 cup
Vanilla Essence 1 tsp
Chocolate Shavings, for decoration 1 cup

Method :-

For Chocolate Cake :-

  • Preheat oven to 350 degree Fahrenheit or 180 degree Celsius.
  • Lightly grease a 9 inch pan with butter and dust it with all purpose flour.
  • Sift All purpose flour and cocoa powder in a wide bowl to remove the lumps.
  • To the same bowl add rest of the dry ingredients i.e sugar, baking soda and salt.
  • In another bowl mix all wet ingredients – water, oil, vanilla extract and vinegar.
  • Now gently fold the wet mixture into dry mixture in batches.
  • Mix it till well blended. Don’t over mix it.
  • Fill the pan with the mixture and bake it in preheated oven for 20-25 minutes.
  • Check the cake by inserting a toothpick in the center and if it comes clean take it out otherwise bake for few more minutes.
  • Let the pan cool for 10 minutes on wire rack.
  • Now remove cake from the pan and let it cool completely on wire rack.

For Cherry Filling :-

  • Drain cherries keeping the liquid reserved for making sugar syrup.
  • Add water to a small pan.
  • Add cherries along with sugar in the same pan and heat it till bubbles come out whisking occasionally 
  • Make slurry of cornstarch by adding 2 tbsp water in a separate bowl.
  • Add this cornstarch slurry to the pan and keep stirring till the cherry mixture thickens.
  • Remove from heat and add lemon juice.
  • Cool completely.

For Sugar Syrup :-

  • Place 1 cup of the reserved cherry syrup in a small saucepan, along with the sugar, and heat until sugar has dissolved.
  • Remove from heat, add 2 tablespoons Kirsch, and let it cool.

For Icing :-

  • In a bowl, add the cream and beat it using mixer/whisk until soft peaks. Now add in the sugar, vanilla essence and then whip until stiff peaks.
  • Peel the chocolate using a peeler to make the shavings. Then refrigerate until use.

For Assembling :-

  • Take the sponge cake and level the top. Now cut the cake into half using a big knife or serrated knife. Transfer the layers to two different plates.
  • Add sugar syrup on top of both the layers so that cake becomes fully moist
  • Place the bottom layer on inverted plate or turn table.
  •  Add cherry pie filling evenly on top. Reserved the rest of cherry filling if left for future use.
  • Add thick layer of whipping cream and spread it evenly on top of cherry filling.
  • Put the other layer of cake on top of whipped cream evenly.
  • Now take a big dollop of cream and place on top..Now spread the cream using a big knife or spatula.
  • After spreading the cream on top, spread some cream in sides using the big knife. You can still see the crumb and cake as icing is very thin. Smooth the icing as best as you can and let it dry. This is crumb coat icing. Put it in the freeze for about 30 minutes.The crumb coat needs to be dry to the touch before you put the final layer of icing on.
  • After the crumb coat dries out take a big dollop of cream for final icing and spread it on top as well as on sides using a big knife or cake spatula.
  • Add the remaining cream in piping bag and decorate the cake on top and sides.
  • Sprinkle chocolate swirls and curls in sides as well as in top..
  • Decorate the top with remaining cherries in the top.
  • Refrigerate minimum for 6 hr or more and Enjoy!

DSC_0071 Notes :-

  • You can use any type of tinned cherry for this cake. Just check out the tartness and accordingly adjust the sugar while making cherry filling.
  • Adding liqueur is optional and you can  avoid it. But the real taste comes with the Kirsch liqueur.
  • You can make the cake beforehand and keep it in fridge for a week. Just remember to wrap it with plastic foil so that it doesn’t get dry.
  • Similarly you can make the sugar syrup, cherry filling beforehand. The cooler the better.
  • Cake tastes best if kept refrigerated for overnight.
  • I have used Kirsch (a clear liquor distilled from tart cherries) for the cake but you can use other liquors too such as Rum.
  • Remember to add vinegar at last while adding all wet ingredients.
  • You can skip making cherry filling and instead add chopped cherries in between the layers.
  • For chocolate shavings and curls you can use store bought or can use homemade. Its very easy to make. I followed below link  http://www.williams-sonoma.com/recipe/tip/making-chocolate-curls-and-shavings.html

Mango Ginger Mousse

Posted: October 17, 2013 in Mousse
Tags: ,

mangomousse

Finally, after a long long time, I managed to force myself to write up something which I hope you’ll like it. I thought this will be a good time to sweeten up things and what’s better than a healthy dessert? Let me present one of my favorite dessert – Mango Mousse with Ginger twist. This recipe is adapted from Tarla Dalal. I think fruit mousse’s require little bit of extra effort and care while making it but it certainly is worth it. The unusual combination of mangoes and ginger inspired me to make a mousse and surprisingly it came out very good. You can enjoy this mousse in summers by using fresh mango or in any weather by using the puree.

Ingredients :-

Alphonso Mango Pulp 1 cup
Agar Agar (China Grass) Powder 5 gms/ 1 and 1/4 teaspoon
Milk
1/4 cup
Lemon Juice
1 teaspoon
Fresh Ginger Juice
1 teaspoon
Crushed Mint Leaves
1 teaspoon
Whipped Cream
3/4 cup

Ingredients :-

Whipped Cream As per taste
Mango Cubes As per taste
Finely Chopped Mint Leaves
1 teaspoon

Method  :-

  • Soak the agar agar in 1/3 cup of  hot water in a deep pan and keep aside for 10 minutes.
  • Add the mango pulp, milk and sugar, mix well and bring to boil, while stirring continuously.
  • Remove from the flame and strain the mixture using sieve.
  • Transfer the mixture into a steel bowl. Place the bowl in a deep vessel filled with ice-cubes for 8 to 10 minutes or until the mixture cools and thickens.
  • Whisk the mixture vigorously and continuously till it is in ice-cubes vessel to avoid any lump formation.
  • Add the lemon juice, ginger juice, mint leaves and beaten whipped cream and fold gently.
  • Pour equal quantities of the mixture into 3 individual glasses and refrigerate for 1 to 2 hours or till the mousse set
  • Serve chilled garnished with a swirl of beaten whipped cream, a mango cube and some mint leaves in each glass.

mangomousse1
Note :-

  • You can add any fruit instead of Mango for garnishing.
  • You can even use gelatin instead of agar agar.
  • Agar Agar is a vegetarian version of gelatin. You can get this in any Asian store.

rasmalai1

Ras Malai is a very popular milk based Indian dessert found commonly in weddings, special occasion or at home. Its originated in West Bengal (state in eastern part of India). In Hindi, ‘Ras’ means “juice/juicy” and “Malai” means “cream”. Its very rich in texture and flavor. Its composed of sugary white or yellow colored flattened balls of Paneer (cottage cheese) soaked in Ras (milk sauce) flavored with cardamom. It is one of my favorite dessert since childhood as I love its juiciness. You can impress your family and friends by making this dessert at home as it is very easy to make. When you are running short of time, you can substitute Malai with store bought Rasgullas (Indian sweet found in Indian/Asian grocery store).
Ingredients :-

Whole Milk
8 cups
Lemon Juice
2 tablespoon
Water
5 cups
Sugar
1 cup
Saffron
a generous pinch
Cardamom Powder
1/4 teaspoon
Pistachios & Almonds, Roughly chopped
2 tablespoon
Sugar for the ras( milk sauce )
to taste

Method :-

  • Take one steel pan and pour 4 cup of milk into it.
  • Take another pan preferably non stick and boil rest of the 4 cup of milk into it. I use non stick because the milk has to be reduced half in quantity and it keep on sticking to the pan while this process. Keep the flame low and keep stirring continuously so that milk does not stick to the pan.
  • Once the milk in steel pan starts boiling add the lemon juice to it.
  • Milk will soon start curdling. This curdle milk is paneer or cottage cheese. Switch off the stove and strain the paneer in cheese or muslin cloth.
  • Pour a little cold water over the paneer and hang the cheese/muslin cloth on the tap for approx 30 minutes to remove all of the liquid.
  • Remove the paneer from cheese/muslin cloth and run it in a food processor so that it comes out very smooth.
  • Divide the paneer into 12 equal portions in a size little smaller than of ping pong balls.
  • Roll the portions in your hands to make a smooth ball. Lightly press the ball until it flattens out.
  • Take a pressure cooker. Add water to it and dissolve 1 cup sugar. When sugar fully dissolves add the flattened paneer.
  • Close the lid and cook until one whistle sounds. Immediately switch off the stove and set the timer for exactly 5 minutes.
  • After 5 minutes, carefully take the pressure cooker to the sink and pour cold water over the lid to remove the pressure.
  • Open the cooker lid and you will see the flattened ball has grown twice in size. Take the balls out with the help of any slotted spoon. Let them cool.
  • Meanwhile the milk in non stick pan should have reduced to half. Add saffron, sugar to taste, nuts and cardamom powder and give it a good stir.
  • Switch off the stove and keep it aside. This is your ras or milk sauce.
  • Once the paneer is cool enough to handle with your hands, gently squeeze out the sugar syrup from the paneer and place the paneer into a serving dish.
  • Pour the ras ( milk sauce) on top of the paneer balls and refrigerate it to chill.
  • At the time of serving garnish it with some chopped nuts.

rasmalai

Note :-

  • You can use evaporated milk instead of reducing whole milk to half. Just boil it once with all the ingredients added to it and its ready as malai.
  • If you don’t have food processor you can soften the paneer with hands. It just take some more time.
  • Never try to replace whole milk with any other kind of milk with lesser content of fat. Lesser the fat of milk lesser will be the quantity of paneer.

strawberrymousse

Recently, I have started liking Mousse due to its creamy, soft & airy texture. Mousse is a type of food that incorporates air bubbles to give light and airy texture which can be categorized in savory or sweet category. It can either be made with whipped eggs or with whipped cream. I have tried Mango Mousse with whipped cream which tasted very nice (watch out for future blog post). It then inspired me to make a Mousse low in calories & fat without compromising richness and taste. This led me to make this recipe which I can indulge as much as I want as its ‘guilt free’. Its perfect for summer as its easy on stomach. In this recipe, I have made mousse using Tofu but I was skeptical and wasn’t sure how it will turn out. To my surprise it actually tasted delicious and has almost similar rich &  creamy texture as butter or cream. This is an elegant dish which can be made in a short time. I have adapted this recipe from whippedbaking.com.

Ingredients :-

For the Mousse

Tofu, Firm and drained
1 14 oz container/400 gms (approx)
Brown Sugar
1/2 Cup
Fresh Strawberries
2 16 oz container/1 kg(approx)
Lemon Juice
1 tablespoon

For the Strawberry Sauce

Fresh Strawberries
12 oz/350 gms (approx)
Brown Sugar
3 tablespoons

Method :-

To make the Mousse :-

  •  Blend tofu, sugar, strawberries, and lemon juice in a food processor until it forms smooth paste. Pour into individual cups and chill before serving.

To make the Strawberry sauce :-

  • Heat a pan on medium heat. Add strawberries and sugar to it and let the strawberries boil till it reduces in sauce like texture. This will take about 10-15 minutes. For me it took 12 minutes.
  • Remove from heat and strain it through colander. Leave strawberries on colander to drip liquid, gently pushing them with a spoon to squeeze out more syrup.
  • Refrigerate it until use.

Assembling the mousse :-

  • Cut some cubes of fresh strawberries and mint leaves for garnishing.
  • Take out the chilled mousse from refrigerator and drizzle the sauce on top of it.
  • Garnish with strawberries and mint leaves.
  • Serve cold.

strawberry mousse

Note :-

  • You can try this recipe with any seasonal fruits.
  • If fresh strawberries are not available, you can use frozen as well.